Holiday Crafting

As always I'm swamped with holiday shows and more busy then I like to be because I'd rather be baking and making holiday crafts this time of year. As busy as I've been I'm managed to squeeze in a few projects...


1. Snowflakes made with lace from a torn table cloth (thrifted) and pieces of broken embroidery hoops I'd been saving. Scissors and a little hot glue and I'm in love!


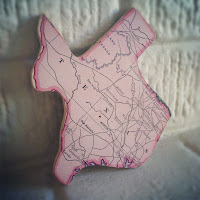
2. I haven't done this since I was a kid and its been all over Pinterest lately so I decided to make bubba hand & foot prints in salt dough for all the family. I also used cookie cutters to make the scraps into state shaped ornaments. You can find lots of recipe variations online but HERE is the one I used. 


3. My holiday masterpiece is this new woodland wall hanging. I took one of my wood round chalk boards from the shop and screen printed my vintage deer in white acrylic. Then I used a paint pen to draw on the holiday banner and snowflakes. My penmanship could use some work but I like it so much I might make them to sell next year. 

What are your favorite family holiday crafts and/or recipes? 
HAPPY HOLIDAYS!! 

Blue Genie Art Bazaar

I had so much fun at Blue Genie last year I was very grateful to get in again this year but with my own eight foot space. I tried to set up a fun space that reflects my shop's personality. I'm pretty happy with how it turned out. Shop my booth and many other amazing artists the entire month of December up until 10pm Christmas Eve. Details in the flyer below!


Handmade Star Wars Costumes


For Halloween this year my husband decided he wanted a Jedi outfit for his office costume contest so we decided the whole family would go Star Wars. Knowing I had a bunch of left over linen and brown felt from another project I decided to challenge myself, using only stuff around the house and a $20 budget for all three costumes.

Jedi Youngling: Gabe's outfit consisted of a wrap around linen undershirt, a sleeveless felt robe, my old belt, an emergency light from the car as a light saber, and booties made of daddy's old socks and stripes of felt. Super easy and cost under $5. 


Obi Wan Kenobi:  Wade's outfit took the biggest part of the budget because I purchased, on sale, some light weight brown fleece to make his robe nice and fitted. A black undershirt, linen wrap, belt, boots, silver hairspray, and light saber made for another easy, cheap costume. Not to mention my boys looked pretty awesome! 


Princess Leia: I'm still missing some files here and there from my computer crashing so I don't have a great one of my costume but it was pretty basic. I had a white sleeveless dress already so I whipped up a cowl neck and long, draped sleeves to wear on top with this belt and matching grey boots. The belt is made of felt, white foam scraps and left over google eyes spray painted silver; all items I had on hand from old projects. Because my hair is short I made a head piece by gluing stripes of felt left over from Gabe's robe into buns then onto a headband.

Besides making a surprise appearance at daddy's work, Gabe also dressed up and we all went to Cedar Park to play in the Halloween games, bouncy houses and see the petting zoo and fire trucks. He was pretty pooped after carrying around R2D2 (aka "ot") around all day.


Giveaway on Facebook


With all the exciting craft shows and events going on this fall I’d like to spread the word as much as possible.  So, I’d like your help and in return one FRIEND and one FAN will receive a bottle cap charm necklace & bonus goodies!  Contest runs October 11-15th, 2012 at midnight.  Visit lost little things on Facebook for more information on how to enter! 


Chicago Renegade Road Trip!

Well shockingly I got into Chicago Renegade this September so my friend Casey and I decided to road trip it 1/2 way across the US in my "new to me" mini van. It was quite the adventure but well worth it!  


We saw a lot of these along the way...


After realizing one of my doors wasn't locking properly (with thousands $ of merch in the back) we took a much needed break in St. Louis on day two of driving. Crab cakes and local beer at Broadway Oyster Bar were a delicious treat. 


Two and a half days of driving we finally hit Chicago a day before Renegade. We rented an apartment near Albany Park on the north side of town. The neighborhood was lovely and there were lots of fun places to eat and shop second hand treasures. Our roommate Oliver (the owners adorable cat we begged her to leave) was quite the character and the apartment even had a little piece of Texas on the mantel. 


One of our first tourist stops included Millenium Park with The Cloud (aka the bean) and famous Crown Fountain. It was a gorgeous view of downtown and the weather was perfect.


Chicago Renegade was fun and CRAZY busy all weekend! I of course loved how my booth turned out, sharing again with my partner in crime GemJunkie. I was surprised how many Austinites we ran into outside of the few vendors who had taken the trip too.  People who were moving to Austin, people who had just moved from, and those just visiting on a random week. I ended up moving my chalk sign to the front of the booth because people wanted to take pictures with it. Made my day.


We spent the last day of our trip just running around town being tourists. A quick stop to the Shedd Aquarium was a beautiful view of Lake Michigan and cityscape. We didn't make it to the Navy Pier but you can see it in the background below. 


The "must do" tourist attraction on my list was to visit the Skydeck in the old Sears building (now Willis Tower), the tallest building in the world.  At 103 floors up my nerves kicked in as I finally found the courage to step out onto the floating glass floor. I'm terrified of heights! I couldn't even look down to take this picture but it was an experience I will never forget. 


We ended the long weekend with some famous Chicago style pizza at Gino's East and got ready for the two  long days of driving back to Austin. 


Other then a visit to the Little Rock in Arkansas, some late night drinks, bbq and an overnight stay in Memphis for my birthday, we hauled butt back to Austin. It was a fun trip but a long one and we both missed our babies. :)


Handmade Robots & Aliens Birthday

Yeah! We had a wonderful first birthday for Gabriel with lots of family and friends. Everyone had fun breaking our fancy recycled robot pinata, playing space games and dress up in robot masks and alien eyes. We had delicious bbq with the help of Wade's brother and a wonderful handmade cake from our friend Amber. 
It was a nice day. 

Robot pinata made from recycled boxes, tissue paper, ribbon, scraps of felt & foam along with old spray paint lids.

The felt banners and party favors were my favorite! Robot masks made out of recycled felt and 1/4" elastic; alien eyes made out of felt, bobble eyes and headbands. 

Gabe enjoying his first real taste of sugar with a homemade vanilla cupcake and cream cheese frosting made by grandma.

Our friend made this adorable three foot long robot cake with chocolate, spicy chocolate and chocolate ding dongs. It was amazing! 

The kids enjoyed coloring spaceships on paper plates, tossing bean bags, playing matching games and tinkering with Gabe's new robot activity mat I made just for this special occasion.


DIY First Birthday Projects Underway

This year we had so many ideas for a first birthday party that we could barely narrow it down. But after going back and forth we finally settled on a robot & alien themed party. I immediately started drawing up ideas for a robot sized pinata, flying saucers bean bag game, robot and alien masks for party favors, etc. 


My DIY projects started with a simple "first birthday" banner with felt...


Then I kind of went felt crazy! But its cheap and easy to work so...


I've started in making vintage robot style masks for all the kids and spaceship themed bean bags for our toss games. 


My attempt at making alien eyeball headbands turned out successful!


Trying to come up with fun games for the older kids to preoccupy themselves I found paper plates make great flying saucers. :)  Stay tuned for more details when we get closer to Gabe's first birthday in July!


That's Me!

I made it to the Austin Statesman in this great article for Mother's Day about moms running handmade businesses by Courtney Sebesta. Click the photo below to read the whole article...


Success! My First Emulsion Screen Print

So normally I've ordered my mesh screens with the chemicals already in place but I decided it wasn't very cost effective when I made mistakes because you can't reuse them. So I decided to take the scary leap and make my own emulsion screens. They are much nicer to work with and can be cleaned and reused over and over.  Because its kind of an expensive hobby and I was a bit intimidated I did my research. Here are a few of my favorite links/videos that I found very helpful:

Etsy How To: Screen Printing & You
Make: Magazine Learn How to Screen Print
Silk Screen Printing Instructions


I get my screens (wood frame) and Diazo emulsion kits at Jerry's Artarama in Austin but you can buy the same supplies online HERE.  I also use Speedball screen printing ink from Jerry's and have found that's my favorite brand to work with.  If you buy a Diazo kit and follow the instructions to mix and apply the chemicals its pretty easy. I recommend starting with a small kit then you can buy in larger quantities later when you've mastered the processes. Once mixed the chemicals have a maximum shelf life of 4 months so unless your making and reusing a lot of screens a small bottle is usually efficient. 


If you don't remember my father-in-law helped me make this great UV lightbox out of old luggage to burn my screens (see post HERE).  Unfortunately I needed a larger, more powerful light source for the bigger screens.  Using the light recommendations from the Silk Printing article above I purchased a 150watt light bulb and a pie pan then set up a portable rig on an old painters tripod I had laying around. Its quite handy as I can adjust the height from the screen by simply shifting the legs and folded up it takes up only a small space in my closet.


I keep two pieces of black foam core and different sized glass pieces on hand as recommended in the research I did. They are used to weight the transparency and protect the screen from light during the process as shown above. Overall applying and drying the chemicals takes me about 1-1/2 hours because I put heavy use to my screens so I double coat them. The burning process takes about 45 minutes with the 150 watt light bulb. I currently make all my own screens in my iddy bitty bathroom. I'd love to send my son off to daycare and work at a professional studio space such as the ASPCO here in Austin but there is something somewhat satisfying about making things the hard and dirty way. As my shop grows I will look to expand my abilities to mass produce product in the future but for now I'm happy to take over my kitchen once a month with beautiful fabrics and paints. 


My first emulsion wood screen was made after my baby boy Achilles. He is currently eight years old, happy and healthy. I've had him since he was an eight week old puppy and to celebrate he is now immortalized in a stuff toy. 


Morning Walk

Just me and Bubba eating breakfast and taking a stroll around the block with our In. We ran into a friendly white cat today who I wanted to scoop up and take home but our lovely Kona wouldn't allow it. 

"breakfast of champs"
PINK!
our friendly neighborhood cat
greeting Gabe
roses are beautiful even when they're dead